reveal.js your Presentation
reveal.js is an open source HTML presentation framework. It's recommended to those with a heart for programmatic approaches and web technologies. I started using it to replace PowerPoint. This article sums up my experiences, shows how the most important tasks can be achieved and then explains my custom method of using reveal.js. If you're interested in bash, it also explains the automation scripts used.
Table of Contents
What is reveal.js?
Use the blue arrows in the bottom right corner to jump between slides.
If you're using a vertical mobile device, consider turning it and reading this article in landscape mode—presentations aren't held on TikTok after all.
To enter fullscreen you have to use a PC, click on the presentation and press F (Esc to exit).
This presenter behaves how a PowerPoint user would expect it.
The creation of such a presentation however isn't anything like PowerPoint.
Everything that is shown is defined in an index.html file, the complete structure of which will be described later on.
What follows are the individual elements forming the presentation.
Slides and Vertical Slides
You create slides inside the <div class="slides"> environment with one <section> tag each.
If you insert another <section> tag within this, you've created a vertical slide.
The default transition between horizontal slides is a horizontal swipe, while vertical slides swap places with a vertical movement.
Here is an example, where ellipsis (...) indicate omitted parts:
<div class="slides">    ...    <section>        Horizontal Slide    </section>
    <section>        <section>            Vertical Slide 1        </section>        <section>            Vertical Slide 2        </section>    </section>
    <section>        <section>            Only using a single vertical slide is also fine;<br />            this has the same effect as a plain horizontal slide        </section>    </section>    ...</div>
I never use plain horizontal slides.
Instead I use the outer <section> tags to group multiple vertical slides into logical units.
When there's a horizontal swipe, the viewer knows that I start talking about a new subtopic.
Press Esc while you're not in fullscreen and on PC.
Now you see the slide overview and you should be able to make out the individual horizontal slides as columns.
This overview serves as a quick access menu if you want to jump to a different slide without mashing your poor keyboard.
From this point on, I for simplicity won't always show the outer <section> tag in the code examples.
Headings and Lists
Since reaveal.js is an HTML framework, you may let all your WebDev skills shine.
If you've never worked with any web technologies, reveal.js is a great way of getting started.
That also means that if e.g. you need lists with numbers, you can google HTML numbered list;
these features aren't limited to reveal.js.
You can use the <h1> tag for headings; <h2>, <h3> and so on are subheadings and subsubheadings.
Lists can be created with the <ul> and <li> tags as shown below.
<section>    <h1>This is a heading</h1></section>
<section>    <h2>This is a subheading</h2></section>
<section>    <ul>        <li>First Element</li>        <li>Second Element</li>    </ul></section>
Horizontal Partitioning
I use the custom class half-part to horizontally split the slide in two parts.
<div class="half-part">    <h3>        The Rearing of Stones    </h3>    <ul>        <li>Stones only multiple in specific aqueous environments</li>        <ul>            <li>Aquarium (space to swim)</li>            <li>Oxygen supply (asphyxiation is no fun)</li>            <li>Ambient light, preferably candles (for the right multiplying-mood)</li>        </ul>    </ul></div>
<div class="half-part">    <img src="./stones.jpg">    <ul>        <li>This is no legal advice</li>    </ul></div>
half-part class is defined in theme/template/custom_styles.scss.
The build system compiling SCSS to CSS I used is described below.
But feel free to simply add the code to a style.css file and import it like this in HTML:
<link rel="stylesheet" href="./style.css">LaTeX
There are many different ways of rendering LaTeX equations with reveal.js.
I chose to use KaTeX, which is loaded via a plugin (check out the template section).
It allows me to write equations wherever I want within a $LaTeX math environment$.
If you need multiple lines, use the aligned environment.
More complex LaTeX structures, e.g. utilizing TikZ, have to be precompiled into an image with transparent background. This article is already nerdy enough so check out 2022_03_14_neue_formeln_messunsicherheiten/stromwaage.tex if you're interested.
<p>    This $F = m \cdot a$ was an inline equation.</p><br />
<p>    Some bigger equation:    \[\begin{aligned}    E &= m \cdot c^2 \\    h \cdot f &= E    \end{aligned}\]</p>
The <p> tag creates a paragraph and the <br / > a newline.
Quotes
<blockquote> "Single thread performance [increase] stopped, because we were starting to fry eggs on the chips [...]." <br /> <span style="float: right;">—Bjarne Stroustrup</span></blockquote>Code Blocks
I'm using highlight.js for code highlighting.
It can again be loaded through a plugin (see the template section for more).
The actual code get's loaded from a separate file (code.cpp) using the external_code plugin.
A little bit of code<pre> <code class="language-cpp" data-code="./code.cpp"> </code></pre>Animations
There are two main ways of animating elements:
- Auto-Animate and
- Fragments.
Auto-Animate
Auto-Animate works by transitioning between two similar slides, which are denoted by the data-auto-animate attribute.
data-auto-animate-restart separates different consecutive animations.
Every element that exists in both slides should have the same data-id attribute;
then reveal.js smoothly transitions between them.
With this you can cleanly add new or change already existent content.
When you not only change the content of a tag but also the type of tag you use, you have to contain the changing tag in a wrapper-div as shown in the example below.
You can find more information in the official documentation.
<!-- transitioning with same content --><section data-auto-animate>    <h1 data-id="hello">Hello</h1></section><section data-auto-animate>    <h1 data-id="hello">Hello</h1>    <h1>World</h1></section>
<!-- transitioning between different tags --><!-- -> transitioning between wrappers with different content --><section data-auto-animate data-auto-animate-restart>    <div data-id="hello_wrapper">        <h1>h1 Heading</h1>    </div></section><section data-auto-animate>    <div data-id="hello_wrapper">        <h4>h4 Heading</h4>    </div></section>
Fragments
The main problem with auto-animate is code duplication: When you add a new tag you still need to redefine your old tags over and over again. Therefore I prefer fragments wherever possible.
When parts of your slide should be revealed bit by bit, assign them the fragment class.
If you need a different order in which to reveal the fragments, use the data-fragment-index attribute as shown in the second example.
<section>    <ul>        <li>I</li>        <li class="fragment">Like</li>        <li class="fragment">Cheese.</li>    </ul></section>
<section>    <ul>        <li class="fragment" data-fragment-index="1">I</li>        <li class="fragment" data-fragment-index="2">Like</li>        <li>Cheese.</li>    </ul></section>
Title Page
At this point you might be wondering how I'm defining the left and right headers on each slide. They are custom and heavily inspired by Benjamin Hackl's reveal.js presentations. And when you're already at it, check out Benjamin's presentations; they inspired me to try out reveal.js in the first place.
Take another look at the very beginning of the example presentation:
<div class="slides"> <div class="header-left"> This is <b>reveal.js</b> </div> <div class="header-right"> <em>Chris</em> • 24<sup>th</sup> June 2022 </div>
<section> <section data-state="titleslide" data-auto-animate> <h1> This is <b>reveal.js</b> </h1> </section> <section data-state="titleslide" data-auto-animate> <h1> This is <b>reveal.js</b> </h1> <h4> More precisely: <b>my</b> way of using it </h4> </section>
<section> You're viewing the third slide.<br /> This example presentation accompanies <a href="https://chris-besch.com/articles/revealjs">the article</a>.<br /> Feel free to take a look; each feature will be explained below. </section> </section> ...Contrary to Benjamin Hackl's version, these headers are defined within the div class="slides"> environment, right before the first slide.
This makes the headers scale correctly with different screen resolutions.
The title section(s) should contain the data-state="titleslide" attribute;
these slides won't show the left header.
Now you can prettily place the title on the first slide and then move it to the top left, so that any laggards joining your audience late know which presentations they are interrupting.
The source code defining the header-left and header-right classes can again be found in theme/template/custom_styles.scss.
Backgrounds
All the different options you have for backgrounds can be found in the official documentation. This is only a little sneak peek of what can be done.
<section data-auto-animate>    <p id="more_things">There are many things reveal.js can use as backgrounds.</p></section>
<section data-background-video="./illusion.mp4" data-background-video-loop data-background-opacity="0.2"    data-auto-animate>    <p id="more_things">There are many things reveal.js can use as backgrounds.</p>    <p>        Like videos showing off what        <a href="https://github.com/Kiran-Raj-Dev">Kiran</a> can do        with <a href="https://www.manim.community">Manim</a>.    </p></section>
<section data-background-iframe="https://chris-besch.com" data-background-opacity="0.2">    Or an Iframe taking your wherever you please.<br />    (Click on this text to unfocus the Iframe again.)</section>
<section data-background-image="./duck.jpg" data-background-opacity="0.3">    Maybe even the beautiful picture of a duck,<br />    taken by an even more beautiful photographer.</section>
Template
To quickly get started you can use my template. I'll keep it updated with any necessary future fixes. Feel free to delete the copyright notice in the top; your presentation belongs under your copyright, not mine. I'd be glad if you could give this article credit but I don't require you to.
There are a few more features that didn't make it in this article. Take a look at my presentations and their source code for some inspiration. This also includes the example presentation used in this very article.
You should notice that there is a light mode as well. Actually there are many different themes you can use—there never is just black and white.
The next few paragraphs explain what else you need to make a reveal.js presentation work.
Installing and Compiling Like Me
When I went to the installation page on revealjs.com I found the recommended method to not suit my taste in the slightest.
You are expected to clone the reveal.js repository, replace the provided example presentation with you own, compile and call it a day.
When you have multiple presentations you have to store the reveal.js source code multiple times and when you intend to use Git for version control, you have to create a fork of the reveal.js repo over and over again.
While searching for a workaround, I realized that the index.html file isn't actually part of the compilation step.
This means that you can compile the reveal.js resources once and use them in multiple presentations;
the compiled reveal.js resources are independent of the individual presentations.
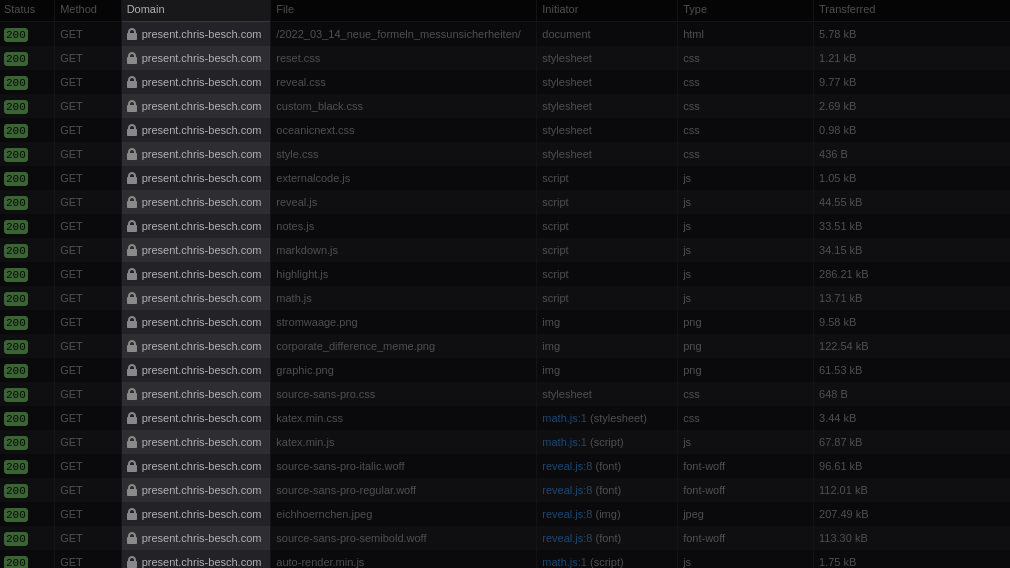
Additionally I need high reliability— when you're standing in front of an audience, your presentation has to work. A necessity for this is the ability to present without an active internet connection. If you're hosting your presentation locally, this might sound simple enough. But it get's more complicated when you realize just how many typical web solutions load resources from content delivery networks (CDNs). These CDNs might not be reachable at all time and are a big privacy concern. Therefore I don't accept anything that doesn't get loaded from my own site. This mostly concerns the plugins I need.
So I created a slightly different way of using reveal.js:
I'm using a single Git repository for all my presentations, each in their own directory.
They have access to reveal.js, my custom themes, whatever plugins I consider useful and other static resources.
A custom build script build.sh puts everything needed for hosting the presentations in the public directory.
Build Script
This section explains in detail what the build.sh script needs to do in order for my way of using reveal.js to work.
It is written for those who are already somewhat familiar with bash scripting and reveal.js's build process.
First of all it clones reveal.js into the build directory reveal, which isn't being tracked by Git (excluded via .gitignore).
After which it checks out a specific version of reveal.js.
echo "cloning reveal.js..."git clone https://github.com/hakimel/reveal.js reveal || true# change directorypushd revealgit checkout 4.3.1Since I use custom themes, I copy them from the theme into the reveal/css/theme/source and reveal/css/theme/template directories.
echo "installing custom themes..."cp -v ../theme/source/* ./css/theme/sourcecp -v ../theme/template/* ./css/theme/templateNow the reveal directory contains everything required to compile reveal.js just like normal.
echo "installing yarn dependencies..."rm -v package-lock.json || trueyarn install
echo "building reveal.js..."yarn run buildpopd
The reveal/dist and reveal/plugin directories contain all output files and get copied into the public folder.
echo "creating public dir..."rm -rv public || truemkdir -v public
echo "copying reveal output files..."cp -rv reveal/{dist,plugin} public
This is also a good time to copy any static files; for example code highlighting themes.
echo "copying static files"cp -vr static public/staticPlugins
The vendor directory contains a few submodules, other git repositories (checked out at a specific commit) contained in a subdirectory.
These are plugins for reveal.js.
echo "copying vendor dependencies..."cp -rv vendor public/vendorSome plugins are precompiled and can't be loaded using submodules. These plugins need to be downloaded and extracted by the build script.
echo "downloading precompiled dependencies..."rm -rfv public/dwn_vendormkdir public/dwn_vendorwget https://github.com/KaTeX/KaTeX/releases/download/v0.15.3/katex.tar.gz -O public/dwn_vendor/katex.tar.gz
echo "extracting precompiled dependencies..."pushd public/dwn_vendortar xfv katex.tar.gzrm -v katex.tar.gz# katex needs weird dist directorymv katex tempmkdir katexmv temp katex/distpopd
The penultimate step is to copy the actual presentations into the public directory and create a table of contents index.html.
Such a table of contents won't be very pretty but it is enough for debugging purposes.
Anyways, everyone knows that software developers don't deserve pretty interfaces ;)
echo "copying presentations..."find . \    -regex './[0-9][0-9][0-9][0-9]_[0-9][0-9]_[0-9][0-9]_[^/]+' \    -exec cp -rv {} public \;
echo "creating table of contents page..."find . \    -regex './[0-9][0-9][0-9][0-9]_[0-9][0-9]_[0-9][0-9]_[^/]+' \    -exec echo "<a href='{}'>{}<a><br />" \; > public/index.html
Development Environment
Because no one wants to build everything over and over when they change a small detail, a few symlinks form a convenient dev environment.
This allows you to directly open your presentation index.html files as if they had already been copied into the public directory.
You can even use live-server, which can be installed with yarn global add live-server, to automatically reload the page when you change your presentation.
If you use VSCode, you can check out the Live Server plugin.
echo "creating symlinks for development..."ln -svf public/dist distln -svf public/plugin pluginln -svf public/dwn_vendor dwn_vendorln -svf public/index.html index.htmlJust don't forget to compile right before publishing the public directory.
Otherwise your changes wouldn't get deployed.
Clean Script
If you intend to undo a build or start a clean one—for example when you've changed the version of a dependency—you can use the clean.sh script.
echo "deleting reveal.js..."rm -rvf reveal || true
echo "deleting public dir..."rm -rv public || true
echo "deleting development symlinks..."rm -v dist || truerm -v plugin || truerm -v dwn_vendor || truerm -v index.html || true
Integrity Checks
Automated tests can really give you the confidence you need when standing in front of a crowd.
So far I have only included the most basic check there is, testing if all referred resources are actually accessible.
The check.sh script does just that.
python3 -m http.server 9329 > /dev/null 2>&1 & \ to_kill=$! && \ sleep 1 && \ broken-link-checker \ -or \ --filter-level 3 \ --input http://localhost:9329 \ --user-agent 'Mozilla/5.0 (X11; Linux x86_64; rv:99.0) Gecko/20100101 Firefox/99.0' || true && \ kill $to_killThis script launches a local web server and silences all output by dumping it into /dev/null.
The single & executes this command in the background.
Everything else is being executed in a separate process, which firstly sets the to_kill variable to the PID of the just-launched web server in the background.
Then we wait a moment for the server to boot up and use the broken-link-checker program, which can be installed using yarn global add broken-link-checker.
In the end the web server gets shot down to avoid any zombie processes.
This is where the to_kill variable gets used.
Directory Overview
What follows is an entire overview of my presentations repository. Comments are in parenthesis.
.
├── 2022_03_07_termbaeume (one folder for each presentation)
│   ├── index.html
│   ├── ...
├── ...
├── dist -> public/dist (symlinks for the dev environment)
├── dwn_vendor -> public/dwn_vendor
├── plugin -> public/plugin
├── public (everything to be published)
│   ├── 2022_03_07_termbaeume (copies of all presentations)
│   │   ├── ...
│   ├── ...
│   ├── dist (reveal output files)
│   │   ├── theme
│   │   ├── ...
│   ├── dwn_vendor
│   │   └── katex
│   ├── plugin
│   │   ├── ...
│   ├── static
│   │   ├── ...
│   ├── vendor
│   │   ├── ...
│   └── index.html (table of contents page)
├── reveal (reveal.js repo)
│   ├── ...
├── static (files that don't get compiled but are used by multiple presentations)
│   └── oceanicnext.css
├── theme (custom themes, written in SCSS and compiled alongside reveal.js)
│   ├── source
│   │   ├── custom_black.scss
│   │   └── custom_white.scss
│   └── template
│       └── custom_styles.scss
├── vendor (git subdirectories for plugins)
│   └── external_code
│       ├── ...
├── build.sh
├── check.sh
├── clean.sh
├── ...
└── index.html -> public/index.html
And with that we reach the end. I hope you learned something; if there're any questions, feel free to reach out via a channel of your liking: Contact.
Have an above-average day!